Difference between revisions of "Teams Winter 2011/team1/Android/Add Options Menu"
| Line 9: | Line 9: | ||
[[Image: A_menu3.png | 500px]]<br/> | [[Image: A_menu3.png | 500px]]<br/> | ||
4.5. In the <code>ContactList</code> class override the <code>onCreateOptionsMenu()</code> method: | 4.5. In the <code>ContactList</code> class override the <code>onCreateOptionsMenu()</code> method: | ||
| − | < | + | <source lang="java"> |
@Override | @Override | ||
public boolean onCreateOptionsMenu(Menu menu) { | public boolean onCreateOptionsMenu(Menu menu) { | ||
| Line 16: | Line 16: | ||
return super.onCreateOptionsMenu(menu); | return super.onCreateOptionsMenu(menu); | ||
} | } | ||
| − | </ | + | </source> |
4.6. Run the application and press the menu button. You should see newly added menu item:<br/> | 4.6. Run the application and press the menu button. You should see newly added menu item:<br/> | ||
[[Image: A_menu4.png | 450px]]<br/> | [[Image: A_menu4.png | 450px]]<br/> | ||
| Line 22: | Line 22: | ||
[[Image: A_menu5.png | 450px]] | [[Image: A_menu5.png | 450px]] | ||
4.8. Add functionality to the menu items. In <code>ContactList</code> class override the following methods: | 4.8. Add functionality to the menu items. In <code>ContactList</code> class override the following methods: | ||
| − | < | + | <source lang="java"> |
@Override | @Override | ||
public boolean onOptionsItemSelected(MenuItem item) { | public boolean onOptionsItemSelected(MenuItem item) { | ||
| Line 52: | Line 52: | ||
} | } | ||
| − | </ | + | </source> |
Latest revision as of 12:20, 28 March 2011
4. Add Options Menu
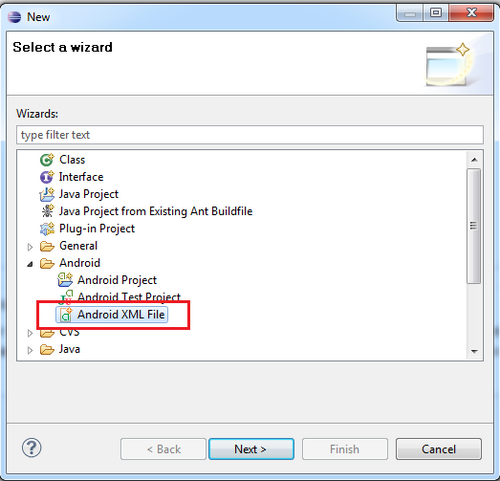
4.1. Add Android xml file to the project: Right Click Project -> New -> Other... -> Android XML File
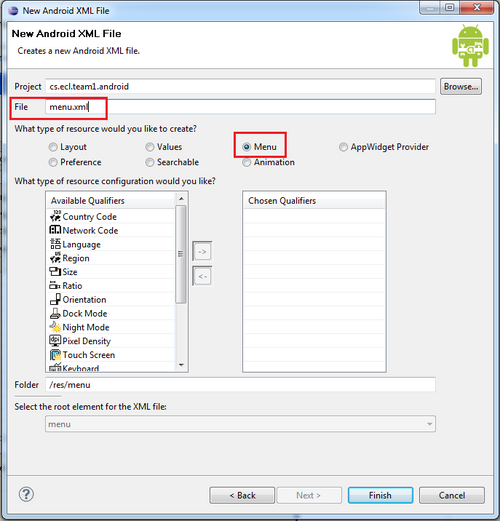
4.2. Specify the file name menu.xml and select "Menu" as type of resource and click Finish
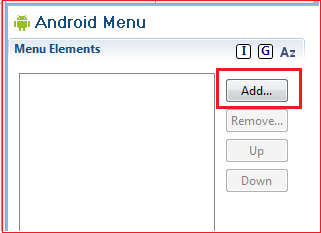
4.3. Go to the menu folder and double click the menu.xml file. Android Menu screen appears. Click Add...:
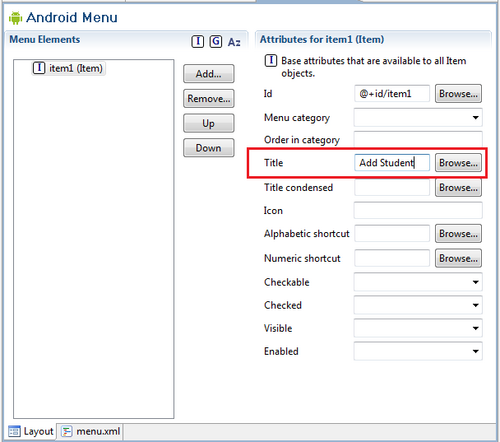
4.4. Select Item and click OK. On the Android Menu screen specify the menu option Title and save the application:
4.5. In the ContactList class override the onCreateOptionsMenu() method:
  @Override
  public boolean onCreateOptionsMenu(Menu menu) {
        MenuInflater inflater = getMenuInflater();
        inflater.inflate(R.menu.menu, menu);
        return super.onCreateOptionsMenu(menu);
    }
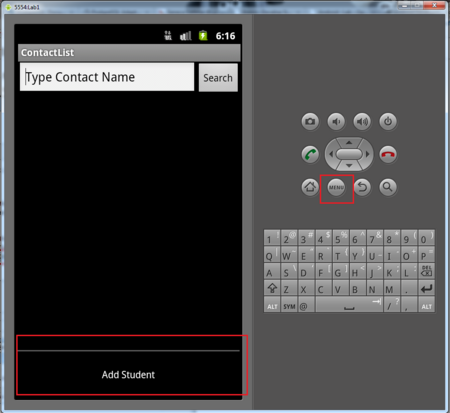
4.6. Run the application and press the menu button. You should see newly added menu item:
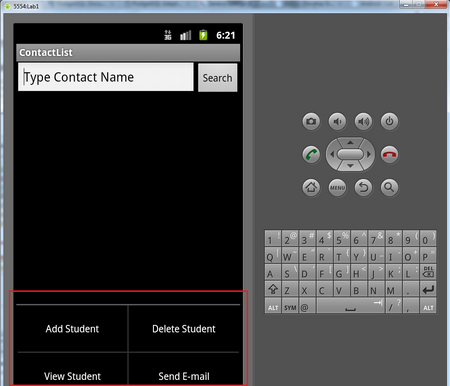
4.7. Repeat the same steps to add Delete Student, View Student and Send Email:
 4.8. Add functionality to the menu items. In
 ContactList class override the following methods:
  @Override
    public boolean onOptionsItemSelected(MenuItem item) {

        switch (item.getItemId()) {
        case R.id.item1:
            //Add Student
            break;

        case R.id.item2:
            //Delete Student
            break;

        case R.id.item3:
            //View Student
            break;

        case R.id.item4:
            //Send e-mail
            break;
        }
        return super.onOptionsItemSelected(item);
    }

    @Override
    public boolean onMenuItemSelected(int featureId, MenuItem item) {

        return super.onMenuItemSelected(featureId, item);

    }