Difference between revisions of "OPS235 Lab 3 - Fedora17"
Chris Tyler (talk | contribs) (→Investigation 2: Installing from the Network) |
Chris Tyler (talk | contribs) (→Investigation 1: Installing from a Live Disc) |
||
| Line 82: | Line 82: | ||
=== Investigation 1: Installing from a Live Disc === | === Investigation 1: Installing from a Live Disc === | ||
| − | + | ==== Introduction ==== | |
| + | |||
| + | In this investigation, you will install Fedora from your live disc, and observe the differences between this type of installation and the DVD installation previously performed. | ||
| + | |||
| + | ==== VM Details ==== | ||
* Name: fedora1 | * Name: fedora1 | ||
| Line 91: | Line 95: | ||
* CPUs: 1 | * CPUs: 1 | ||
| − | + | ==== Steps ==== | |
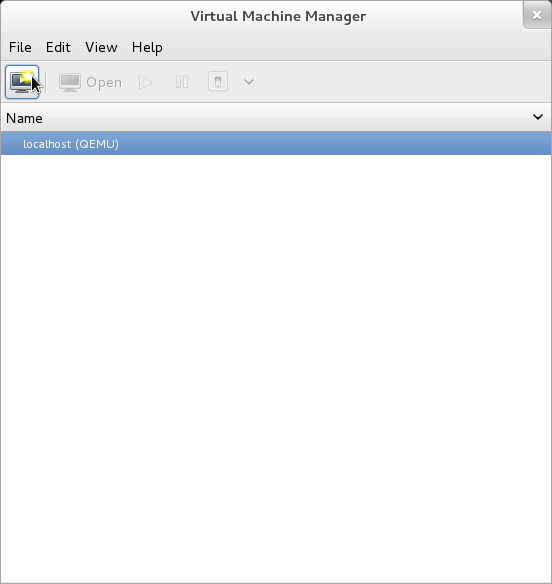
# In the Virtual Machine Manger, click on the icon to ''Create a Virtual Machine'' in the upper-left corner: <br />[[Image:Virt-manager1.png]] | # In the Virtual Machine Manger, click on the icon to ''Create a Virtual Machine'' in the upper-left corner: <br />[[Image:Virt-manager1.png]] | ||
Revision as of 10:50, 20 January 2010
Contents
- 1 Using Virtual Machines
- 1.1 Objectives
- 1.2 Reference Material
- 1.3 Required Materials
- 1.4 Introduction
- 1.5 Instructions
- 1.6 Preparing for the Quizzes
Using Virtual Machines
Objectives
- Understand Virtualization
- Use KVM virtualization on Fedora
- Use a variety of installation methods
- Live Image Installation
- Network Installation
- Kickstart Installation
Reference Material
Virtualization
Installation Methods
- Live Image Installation
- Network Installation
- Kickstart Installation
Required Materials
- Removable disk pack with Fedora installed (see Lab 2).
Introduction
A virtual machine is a software simulation of a computer which can be used as though it were actual hardware. It's possible to run multiple virtual machines on one computer, reducing hardware requirements and introducing flexibility. Some common uses of virtualization include:
- Software testing -- Using multiple operating systems simultaneously on a single computer for testing and experimentation.
- Network simulation -- Testing network services, protocols, and security scenarios with a small number of computers.
- Isolation -- Protecting multiple sets of data by storing them on multiple virtual machines.
- Server consolidation -- Reducing the number of physical servers in a network by moving physical machines to virtual machines. This saves hardware, administration, cooling, and electricity costs, and it can increase the utilization of hardware (by ensuring that the hardware is not under-loaded).
- Load-balancing and disaster recovery -- It is possible to migrate virtual machines between different physical machines, to ensure that a workload is balanced across multiple computers, to allow routine hardware maintenance and upgrading, and to compensate for hardware failure or other disasters.
In this lab, you will create three virtual machines. This also gives you an opportunity to experiment with different ways of installing Fedora. Later in this course you will install another operating system distribution in a virtual machines.
You have already used a Fedora live disc and an installation disc. In both cases, the boot media (which you used to load the installation software) and the installation source (where the software that got installed came from) were the same: they CD/DVD provided both. However, the Fedora (and most other Linux distributions) permits you to use any combination of boot media and installation media:
- Boot Media
- CD or DVD
- Hard disk
- USB flash drive
- Network boot
- Installation source
- CD or DVD
- Hard disk
- USB flash drive
- Network HTTP or NFS software repository
When you installed Fedora in Lab 2, you did it interactively -- you manually specified all of the installation options, and then the installation process was started. This is fairly convenient for single-machine installations, but is time-consuming and possibly error-prone when repeated for dozens, hundreds, or thousands of machines.
For large installations, it's possible to specify the installation options in a file so that no user intervention is required. This is called a kickstart installation.
Instructions
Preparation
- Install the Fedora virtualization software:
yum groupinstall "Virtualization"orpkcon install @virtualizationThe virtualization software installed is in three parts:- A system service named libvirtd that manages the VMs.
- Tools to manage virtualization, including the
virt-managergraphical tool and thevirshcommand-line tool. - The actual virtual machines themselves.
- Start the virtualization service:
service libvirtd start - The firewall configuration is altered by the addition of the virtualization software. Restart the firewall so that these changes become active:
service iptables restart - Start the graphical tool by selecting the menu option Applications>System Tools>Virtual Machine Manager or by typing the command
virt-manager
Investigation 1: Installing from a Live Disc
Introduction
In this investigation, you will install Fedora from your live disc, and observe the differences between this type of installation and the DVD installation previously performed.
VM Details
- Name: fedora1
- Boot media: Fedora Live CD
- Installation source: Fedora Live CD
- Memory: 512MB
- Disk space: 10GB
- CPUs: 1
Steps
- In the Virtual Machine Manger, click on the icon to Create a Virtual Machine in the upper-left corner:
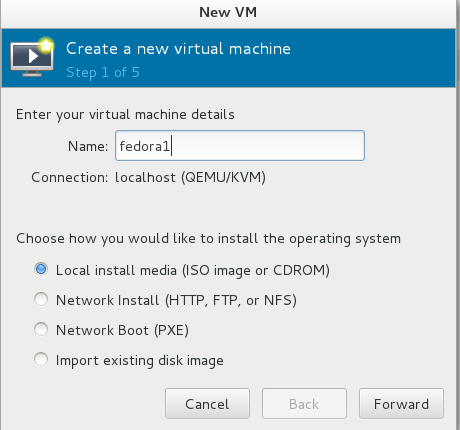
- A window will appear with the title New VM. There are five steps to be completed; click Forward after each step:
- Step 1 of 5: Enter the virtual machine name and select Local install media.
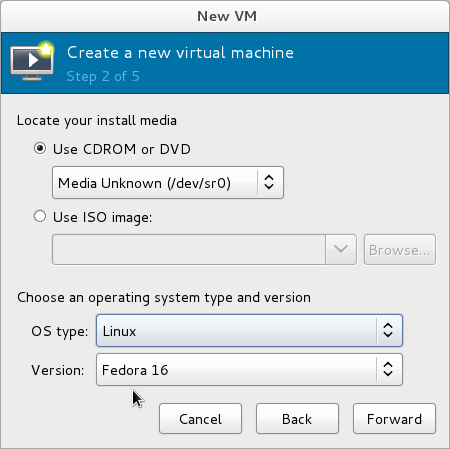
- Step 2 of 5: Insert the CDROM or DVD containing the Fedora Live Disc image. Wait a moment for the disc to be recognized, then select it as the install media. Set the OS type to Linux and the Version to Fedora 12.
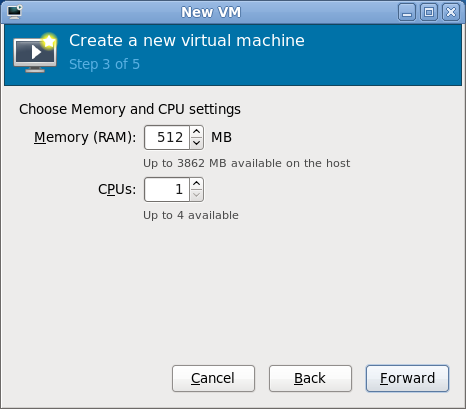
- Step 3 of 5: Set the memory to 512 MB and the number of CPUs to 1.
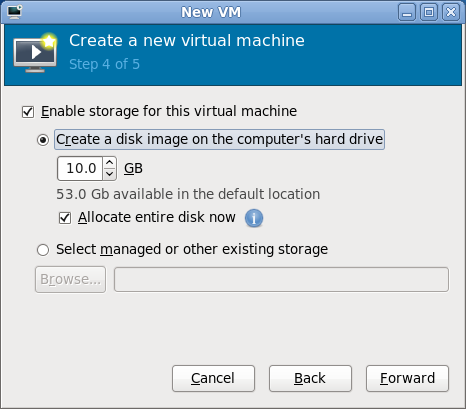
- Step 4 of 5: This next step creates a disk file that will be used to simulate the virtual machine's disk drive. Select a size of 10 GB and checkmark the box labeled Allocate entire disk now.
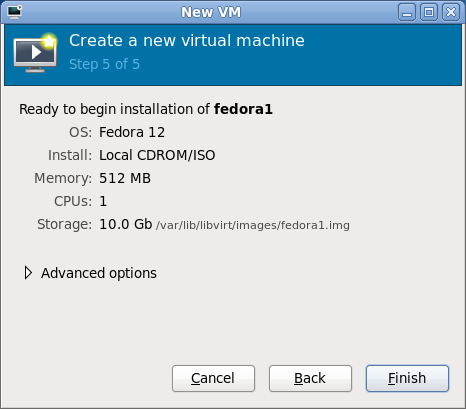
- Step 5 of 5: Review the options that you have selected. Make a note of the storage location. If anything needs to be changed, use the Back button to go back and edit it; otherwise, click Finish.
- The virtual machine will now start. You will see a window which displays the virtual video card from the VM. The video It's important to note that the VM can (and often will) run even when this display is not present. The virtual machine is running from the live disc at this point, and no software has been installed on the hard drive of the virtual machine.
- Login to the VM and double-click on the Install to Hard Drive icon. The installatin program, similar to the one used when installing Fedora in Lab 2, will appear. You will get a warning at one point during the installation process that the disk "may need to be re-initialized" -- this is simply a warning that the virtual disk is completely blank, and it is safe to select Re-initialize drive.
- During the installation process, when prompted for the hostname, enter "fedora1", when prompted for the timezone, select America/Toronto, and when asked about storage, select Use Entire Disk. Use the default values for all other fields. Notice that the installer does not ask you what software should be installed; compare the installation time to the amount of time it took to do your Lab 2 installation.
- When the installation is complete, select the menu option System>Shutdown to stop the Live Disc.
- Start the VM from its disk image by selecting Virtual Machine>Run from the virtual machine menu. You will get the Firstboot configuration questions during the boot process (asking you to create a user, set the date and time, and optionally send the hardware profile to the Fedora Project). Create a user with the same name as your Matrix account.
- Login using the new user account.
- Enable SSH access to your virtual machine with these commands:
service sshd start; chkconfig sshd on - Find out the IP address of your virtual machine:
ifconfig eth0 - Confirm that you can ssh to your virtual machine from the host (your main Fedora installation):
ssh IPaddress


Investigation 2: Installing from the Network
Introduction
It is possible to install Fedora entirely from the network. In this investigation, you will install Fedora from a webserver on Seneca's LAN.
VM details
- Name: fedora2
- Boot media: Network installation
- Installation source: http://belmont.senecac.on.ca/fedora/releases/12/Fedora/x86_64/os/
- Memory: 512MB
- Disk space: 10GB
- CPUs: 1
Steps
- Create the VM as you did with the fedora1 virtual machine, except:
- In step 1 of 5, set the installation type to "Network Install (HTTP, FTP, or NFS)"
- In step 2 of 5, provide the URL http://belmont.senecac.on.ca/fedora/releases/12/Fedora/x86_64/os/
- Observe the boot process. How is it different from booting from an optical disc (CD/DVD)?
- Start the installation process. When you get to the disk partitioning step, enable the checkbox labelled Review and modify partition layout. On the next screen, change the logical volumes as follows:
- Reduce the size of the root LV to 4000 MB.
- Add a logical volume with a size of 1000 MB and a mountpoint of /home (you can name it whatever you want).
- On the software selection screen, uncheck the box for Office and Productivity (as well as the other software choices).
- On the same screen, select the "Fedora 12 - x86_64" and the "Fedora 12 - x86_64 - Updates". DO NOT enable the "Test Updates" repository.
- Complete the installation. Record the time taken to install, and compare this to the time taken by the previous installations.
Investigation 3: Installing using Kickstart
Introduction
When Fedora is installed using the techniques you have used so far, the user is asked a number of questions. In some situations, it is better to provide the answers to these questions in a file rather than answer them individually. This type of file is called a kickstart file.
In this investigation, a kickstart file is provided for you. You can also create or modify a kickstart file using a regular text editor or a graphical tool.
VM details
- Name: fedora2
- Boot media: Network installation
- Installation source: http://belmont.senecac.on.ca/fedora/releases/12/Fedora/x86_64/os/
- Kickstart location: http://zenit.senecac.on.ca/~chris.tyler/fedora3-ks.cfg
- Memory: 512MB
- Disk space: 10GB
- CPUs: 1
Steps
- Create the VM as you did with the fedora2 virtual machine, specifying a network install as before, except:
- In step 2 of 5, after entering the URL for the installation source, click on the URL Options control.
- Enter the Kickstart URL: http://zenit.senecac.on.ca/~chris.tyler/fedora3-ks.cfg
- Observe the installation. How is it different from booting from an optical disc (CD/DVD)?
- Complete the installation. Record the time taken to install, and compare this to the time taken by the previous installations.
- What happens when the installation is finished?
- Take a look at the kickstart file to determine the root password as well as the name and password for the first user account.
- Boot the virtual machine and log in. Compare the experience to booting the other virtual machines.
Investigation 4: Updating the VMs
- In each VM, run this command:
yum update - How long does it take to run?
- Why does it take longer in some VMs than others? Why are some VMs completely up-to-date?
Investigation 5: How do I backup a virtual machine?
- Shut down all of the virtual machines.
- Change to the directory
/var/lib/libvirt/images/. Note the size of the files in this directory. - Make a compressed backup of the
fedora3.imgfile with this command:gzip <fedora3.img >fedora3.img.backup.gz - Compare the size of the compressed and original files.
- Start the fedora3 VM.
- Wreck it! Try this command:
rm -rf / - Shut down the VM.
- Restore the original image from backup:
gunzip <fedora3.img.backup.gz >fedora3.img - Restart the VM. Is it working normally?
- Create compressed backups of your other virtual machines.
Preparing for the Quizzes
- What are the advantages and disadvantages of each type of installation?
- Which type of installation works best for confirming compatibility with hardware before installation? Why?
- Which type of installation works best for installing large numbers of computers? Why?
- What factors affect installation time?
- How can you reduce the number of software updates required immediately after installation?
- How do you start and stop virtual machines?
- How do you SSH into your virtual machines?