Advanced Recording with Audacity
Contents
Purpose
- This WIKI explains how to use the Audacity application to create more advanced recordings.Audacity is an easy-to-use digital multi-track audio recorder and processor.
- This tutorial will focus on recording several musical instruments and vocals to produce a song.
YouTube Video
- If you want to see the visual steps for "Simple Recording with Audacity",
- Here is a link to a customized YouTube video: http://www.youtube.com/watch?v=uppLRSh2RCI
Written Instructions
- Below are the instructions on how to create a simple recording (eg. commercial) using the Audacity application:
- WARNING: YOU ARE NOT PERMITTED TO USE COPYRIGHTED MATERIAL WHEN USING ANY APPLICATION IN THE WESTMINSTER COMPUTER LAB WITHOUT PERMISSION OF THE ARTIST. IT IS RECOMMENDED THAT THE MUSIC YOU CREATE BE "HOME-MADE", OR USE PUBLIC DOMAIN MUSIC.
Better Tools for Advanced Recording
- More advanced recording with Audacity (such as recording musical instruments and using professional-grade microphones) requires a better input recording device. For example, if the simple WebCam in the computer lab was used to record musical instrument and vocals, a great deal of audio quality would be lost.
- One affordable solution is to use USB recording studio devices.
- Currently, the Computer Lab does not have such a device, but a request will be made in the future for such a device.
- On the other hand, in the meantime, there are at least 2 current members of the Westminster United Church congregation that own these types of devices:
- Maudio Fast Track Pro (link to picture: click here)
- Tascam US-122 Audio/MIDI USB device (link to picture: click here).
- Although both of these devices work in the lab, the Maudio USB devices are preferred because they work with Linux systems without complex tweaking (i.e. they work "out of the box").
- Since this author owns the Tascam US-122 USB device, they will be using that device throughout the remainder of this tutorial...
Automating (Simplifying) the Process
- One generally assumed (and incorrect) perception of recording in Linux is the complexity of advanced recording.
- In order to perform advanced recording with multi-track applications, several applications required to be launched.
- Here would be an example of some of these applications:
- Jack Audio Server
- Hydrogen Drum Machine
- Qsynth Synthesizer/Sampler
- Bristol Organ
- Rakarrack effects processor
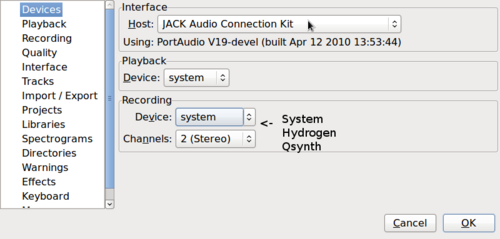
(Note: vocals, guitar, bass guitar can be recorded by connecting to the USB recording device, for example the Tascam US-122, and selecting the recording device in the Audacity Preferences dialog box as "system"...)
At the heart of these applications is the Jack audio server. It acts like a "conductor" that controls and patches (i.e. connects) instruments from various applications together. Other applications accomplish this task by using features such as VST or VSTi (which Linux supports that technology).
In order to simplify things for the Westminster Computer Lab users, a program (Bash shell script) has been created to automatically launch and connect these programs together (in a very user-friendly manner), so individuals can concentrate on just recording their music. The user simply logs into the Teacher account, and double clicks on the Recording Studio icon.
Using Audacity (Advanced Multi-track Recording)
Audacity is a simple to use and intuitive application to allow a user to record and manipulate an audio product. Audacity can record drumming tracks from Hydrogen, record keyboards from Qsynth, as well as record vocals from a microphone...
Steps to Launch Audacity
- In the Audacity menu bar, select EDIT -> Preferences
- The Audacity Preferences Dialog Box will appear.
- Remain in the default Devices tab.
- Under Interface section, the Host Should read Jack. If not, click the drop down box to select Jack
NOTE: If Ubuntu Studio was installed (i.e. Ubuntu Studio distribution CD, not just adding Ubuntu Studio to already installed system), Audacity should set the Jack Audio Server as the default interface.
If not, you can select the default interface manually:
Steps to Manually set Interface:
- In the Audacity menu-bar, select EDIT -> Preferences
- The Audacity Preferences dialog box application will appear.
- Remain in the default Devices tab.
- In the Interface Section, select Jack to be the host.
- Click OK to save changes.
The procedure to select different instruments in Audacity is subtle! I don't know if this is the BEST method, but here is what I know works...
Assuming that you are still in the Audacity Preferences dialog box (Devices tab), in the Recording section, click on the drop down menu for Devices. If you are running your Jack Audio server, and running Qsynth as well as Hydrogen, you should see 3 devices:
- Hydrogen (Drum Machine)
- Qsynth (Keyboards)
- System (Vocals via Microphone)
Let's add in each of these elements, track-by-track
Adding Drums (Hydrogen)
In the Audacity Preferences dialog box, under devices, select Hydrogen (Drum Machine), and close the dialog box. NOTE: Each time you want to "lay-down" a track using a different device, you MUST go to Audacity Preference dialog box and select your Recording Device...
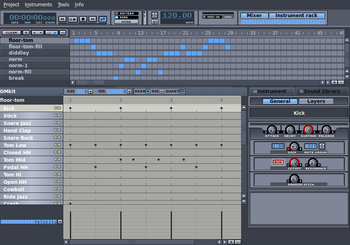
Hydrogen is a drum machine application. It is useful to allow the user to record drumming patterns (to be looped), or entire drumming patterns for a song.
Although I prefer a REAL drummer, you can use a drum machine as a basis for your song. After the song has been recorded (via Audacity), you can mute the drumming pattern and replace with real drums...
The Hydrogen drum machine is pretty easy to use. Just press RECORD, and then click on an appropriate drum sound. The drumming pattern loops, so you can take your time to build more complex drumming patterns. Various drumming patterns can be saved and then can be added in a sequence to build a song... This application also has a "pattern" mode and a "song" mode...
Create a drumming pattern, and press play on the hydrogen application to test out the drumming pattern. Stop the drumming pattern.
When you are ready to record, click the record button in the Audacity transport toolbar, and then click the play button in the hydrogen application. Don't worry if there is blank audio, since you can always cut the unwanted portions of the track after recording. When finished, then click the stop button in Hydrogen, and then click the stop button in Audacity. It is recommended to immediately click the rewind button to set the position to the beginning of the track.
Adding Guitar / Bass Guitar
To be completed...
Adding Keyboards (Qsynth / Bristol Organ)
I have see some misinformation regarding the use of sound-fonts with Qsynth. You can add in a lot of sound-fonts with Qsynth, and then assign them (either using a particular sound, or incorporating "sound banks") to midi channels. I am currently have assigned instruments to 10 midi channels (2 have been reserved for my B3 Organ. In addition, you can save these midi assigns as different "preset names" to be saved and loaded as needed during performance or practice.
In order to assign MIDI channels in Qsynth, when you click the Channels button, you will see the Channels dialog box appear. Notice that this dialog box allows for a total of 16 midi channels (this is more than I require for a typical practice or performance). If you require more, you can save different midi instrument assignments to various profiles (perhaps to be loaded between your sets).
Steps to Assignment Instruments:
- When adding sound-fonts into Qsynth, write-down the SFID number (i.e. Sound-font Identification number) - Do NOT close this dialog box quite yet!
- Now, here's the trick: For each sound font, make certain that the "Offset" number corresponds to the same number as the SFID!
- Now, click OK to save and exit the sound-font dialog box.
- If you are running Jack, then you need to restart the Jack engine. This will require that you manually connect the instruments in the "Jack Connections" dialog box. If this is "a pain", you could always quit all applications, and re-run your Bash shell script to launch your music session...
- Go to the Channels dialog box, and double-click on a midi channel.
I am selecting the next available channel - 13. - The Channel 13 Midi Channel Dialog box appears.
- Select the Bank number (which corresponds to the Offset or SFID that you have written-down).
- Then click on the program number to select an instrument (depending on the sound-font, there may be only one to select, or a wide variety if the sound-font is a bank of sounds).
- !! NOTE: in order for the changes to take effect, you need to click the Save button; otherwise, all your changes will be lost!
- You may need to restart the Jack engine and re-establish your connections.
That's it! Start performing!!
My M-AUDIO keyboard allows me to easily change between midi channels by pressing the Advanced Functions button, and then pressing a note on the keyboard that corresponds to the midi channel. Easy-Breezy, and efficient! :)
Here is a link to documentation of my M-AUDIO midi keyboard for reference:
[ http://www.m-audio.com/images/global/manuals/050505-KSSeries_UG_EN01.pdf ]
Dealing With Latency Issues (Keyboard)
When laying down multiple tracks among different instruments, you may find that a track may be out-of-sync with the other tracks. This is probably due to the latency or "delay" from playing your keyboard instrument.
Note that your keyboard is hooked up to a device to read input to the computer system. There will be latency (or in other words, a delay) between the time you press a key on the keyboard, and when that sound is generated via Qysnth. This is quite normal with other programs. In fact, when using my computer setup when playing keyboards, I have become so accustomed to the delay, that is takes me a second to realize it is not strange when playing a REAL piano with no latency!
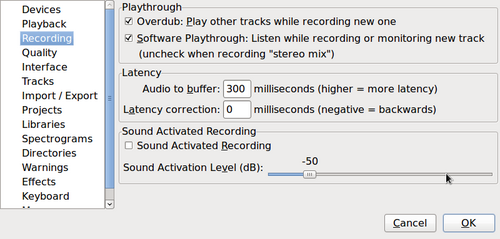
The good news is that Audacity can be set to factor in the latency from devices such as keyboards. In fact, if you notice carefully after recording a keyboard track, that the length of the track (after recording is complete) will slightly compress to compensate for this latency or delay. Therefore, all that is required is to find the optimum "correction amount" to compensate for keyboard latency.
Steps to Compensate for Keyboard Latency:
- In the Audacity menu bar, select EDIT -> Preferences
- The Audacity Preferences Dialog Box will appear.
- Select the Recording tab.
- Increase or decrease the Latency Correction amount (in milliseconds) to obtain the correct balance.
- Click OK to save changes.
Adding Vocals
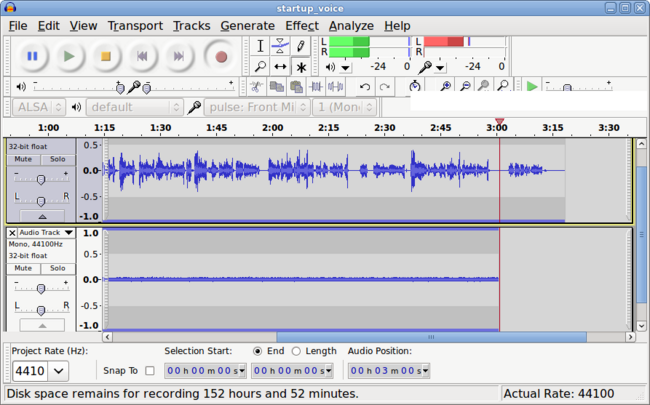
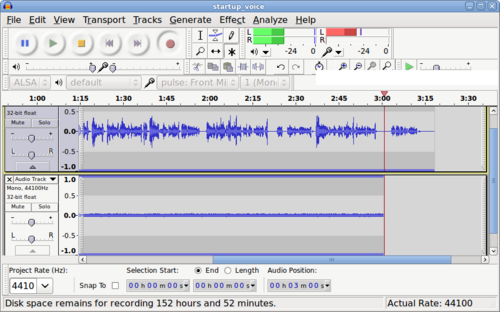
- By default, this application uses the computer system's default input device (which you selected earlier). To record your voice, simply click the record button in the transport toolbar, and start recording your voice. You should notice a track automatically appears as you are recording your voice. When you have completed recording, then click the stop button. It is recommended that you click the rewind button (contain in the transport toolbar) to return the pointer to beginning of the recording.
Mixing Down to MP3 File
To be completed...
Quickest Method for Shutting Down Applications
To be completed ...
Interesting Features
Importing Music into Audacity
To be completed ...
Reducing Tempo (Without Affecting Pitch)
To be completed ...
Creating Playback Loops
To be completed ...
Additional Resources
Tutorials
To be completed ...
